1. Requirement
To follow this tutorial, you need the following software and resources.
- JDK (Java Development Kit)
- Min Version : 7 update 25 (or more recent) or 8
- Download : http://www.oracle.com/technetwork/java/javase/downloads/index.html
- Installation Instructions :
- Netbeans IDE
- Min Version : 7.4
- Download : http://netbeans.org/downloads/
- Inno Setup
- Min Version : 5.5 or more recent
- Download : http://www.jrsoftware.org/isdl.php
- WiX
- Min Version : 7 or more recent
- Download : http://wix.codeplex.com/releases/view/99514
2. Installing and Adding Required Tools to the Path
To use the IDE’s support for native packaging, the following additional tools need to be installed:
2.1 Inno Setup
- Download Inno Setup (Ex : innosetup-5.5.9.exe)
- Double-click the file to launch the installer
- Accept the Inno Setup license agreement and click Next
- Follow the instructions in the install wizard for installing Inno Setup
- Add Inno Setup to the system Path variable:
- Go to start menu -> Type -> System
- Select the Advanced tab and click the Environment Variables button
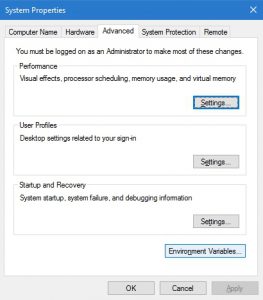
- In the System Variables pane, double-click the Path variable
- In the Edit System Variable dialog box

- To check if the installed tool is in the Path, open the Command Prompt window and type iscc.exe
- You should see the Command Prompt window :

2.2 WiX
- Download Wix (Ex : Wix37.exe)
- Double-click the file to launch the installer
- Accept the Wix license agreement and click Next
- Follow the instructions in the install wizard for installing Wix
- Add WiX to the system Path variable:
- Go to start menu -> Type -> System
- Select the Advanced tab and click the Environment Variables button

- In the System Variables pane, double-click the Path variable
- In the Edit System Variable dialog box

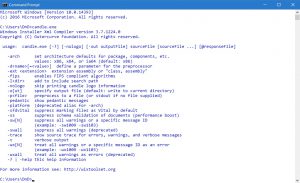
- To check if the installed tool is in the Path, open the Command Prompt window and type candle.exe
- You should see the the Command Prompt window :
3. Native Packaging in Java SE Projects
3.1 Creating Project
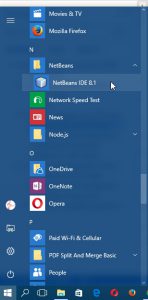
- Open Netbeans (Go to start menu -> Programming -> Netbeans)
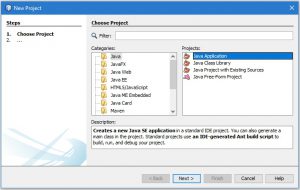
- Click the File menu and select New Project…

- Choose :
- Java in the Categories list
- Java Application in the Projects list
Then click Next.
- In the Name and Location panel,
- Type “Project_5” in the Project Name Text Field to change Project Name, or leave the default values for Project Name.
- Click Browse button in the Project Location fields to change project location à Navigate to save project directory (ex: D:\DnD_Home\Program\20161\Java_Test\Netbeans\Project_5\), or leave the default values for the Project Location fields.
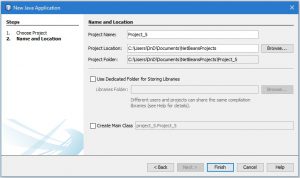
- Click Finish.
- After we click finish we get a desktop application with some code and windows.

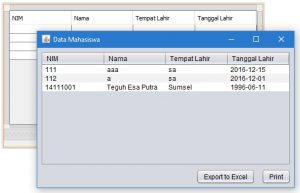
- Click the Run button in the tool bar or choose menu Run à Run Main Project to see what is displayed when we Run the application with the default code.

- The application should launch and display on your machine.
3.2 Enabling Native Packaging for the Project
The native packaging actions are disabled in the IDE by default.
- Right-click the Project_5 project in the Projects window, to check the actions available for the created Java SE project in the IDE: there are no package related actions in the project’s context menu.
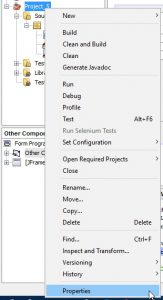
- To enable native packaging actions for the project:
- Right-click the project node in the Projects window and select Properties from the context menu.
- In the Project Properties dialog box, choose the Deployment category and select the Enable Native Packaging Actions in Project Menu option.
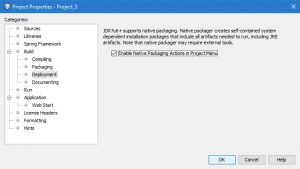
- Click OK.
A Package as command is added to the project’s context menu. You should see “Packages as” in the context menu.
3.3 Building an Application
Clean and build your project:
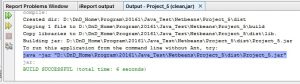
- Choose Run -> Clean and Build Project from the main menu.

- A dist folder that contains a jar file is created in the project folder.
- You should see in the Output window.
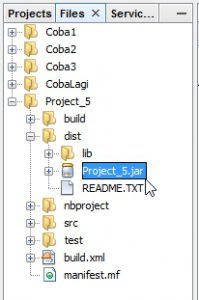
- To check a jar file, click the Files window and navigate to your project (ex : Project_5) -> dist
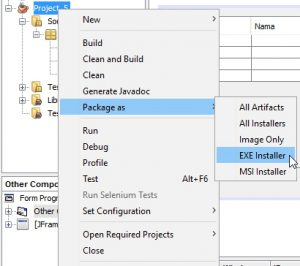
3.4 Making an EXE Installer
The application can now be packaged in an installer for Windows. To build an EXE installer :
- Right-click the Project_5 project and choose Package as à EXE Installer from the context menu.

- You should see in the Output window.

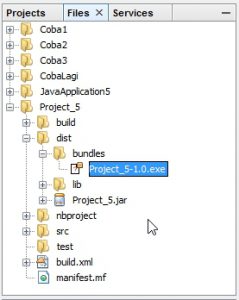
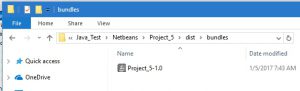
- To check a Exe file, click the Files window and navigate to your project (ex : Project_5) -> dist -> bundles
4. Verifying the Installable Applications
When the Project_5-1.0.exe installers are done, you need to check which directory the Project_5 applications are installed natively into.
To check the installers:
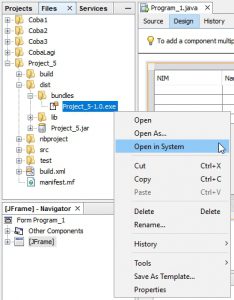
- Browse to the installer file (Project_5-1.0.exe) on your hard drive -> Double-click to run the installer.
- Or right click Project_5-1.0.exe from the context menu -> choose Open in System.
- Follow the instructions in the install wizard for installing Project_5

- Both the applications should be installed into the C:\Users\<username>\AppData\Local\ directory and be available in the Start menu.

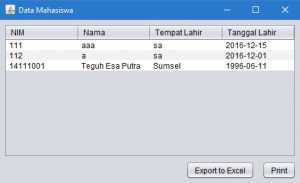
- Launch Application
PDF Download : Creating an Executable Java File in NetBeans IDE (7.4 or 8.0 or latest version)


